Hello everybody, hope you are having an incredible day today. Today, we’re going to make a special dish, rich chocolate slice cakes. One of my favorites. For mine, I am going to make it a little bit tasty. This will be really delicious.
Rich Chocolate Slice Cakes is one of the most favored of recent trending meals in the world. It is simple, it’s fast, it tastes yummy. It is enjoyed by millions every day. They’re fine and they look wonderful. Rich Chocolate Slice Cakes is something that I have loved my entire life.
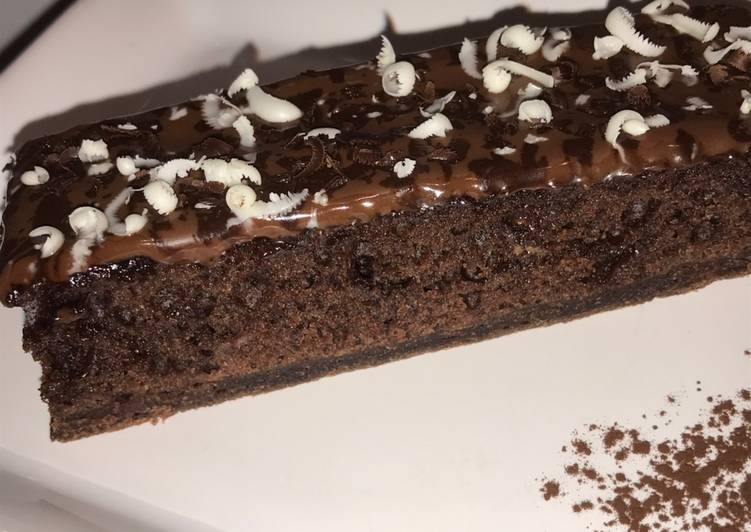
Slice the cake and serve with a dollop of orange cream and garnish with the orange zest and the physalis. For Valentine's Day and other special occasions, I treat my sweeties to this fudgy cake. Even a small slice satisfies the biggest chocolate craving.
To get started with this recipe, we must prepare a few components. You can cook rich chocolate slice cakes using 19 ingredients and 16 steps. Here is how you can achieve it.
The ingredients needed to make Rich Chocolate Slice Cakes:
- Take 8 oz Plain Flour
- Take 2 heaped dessert spoons Cocoa powder
- Prepare 4 oz Butter or Marg
- Prepare 2 oz Castor Sugar
- Make ready 1 Egg
- Prepare 1/4 tsp salt
- Prepare 1/2 Cup Cold Water
- Make ready Cake Mix
- Get 8 oz Self Raising Flour
- Prepare 8 oz Margarine or Spread
- Take 6 oz Castor Sugar
- Make ready 6 Eggs
- Make ready 2 oz Cocoa Powder
- Make ready 1 Small Bag Chocolate Chips
- Prepare Grated Chocolate (see pic)
- Make ready Ganache (optional)
- Take 1 pint Double Cream
- Take 1 Block Dark Cooking Chocolate
- Take Chocolate Shavings to decorate
This chocolate cream cake is loved by everyone! Chocolate chiffon cake with rich fudgy chocolate icing and filling, decorated with colorful sugar candy toppings. Personalize this cake with your own special message! Buttery, light pound cake that is great for snacking!
Instructions to make Rich Chocolate Slice Cakes:
- I make the pastry in advance to rest it overnight in the fridge
- Put the flour and cocoa powder, sugar and salt into the mixing bowl, combine well. I just use a whisk for my pastry making as it's easy and prevents shortening.
- Add the butter or margarine and using the whisk break it up in the flour until it’s to crumb.
- Add the egg and some of the water, mix to a dough paste adding more water where required to form a ball.
- Cover your pastry in cling film and leave in the fridge to rest.
- The Cake mix. Add the sugar and margarine to a blender and whisk until your mixture turns a very light colour, normally after about 5 minutes.
- Whilst they are mixing, weigh out your flour into a separate bowl and add the chocolate chips ensuring they are all covered in flour. This prevents them from all sinking to the bottom of the sponge when cooking. Then to the flour add the cocoa powder and mix in well with a fork.
- Going back to your blender, add the eggs to the margarine and sugar, 2 at a time to blend them in (this prevents splitting). Once all the eggs are blended, remove the bowl from the blender and using a large spoon, add the flour and start gently ‘cutting in’ this keeps the air in the cake mix.
- Preheat the oven to 150 (gas mark 4)
- Roll out the pastry on a flour dusted worktop quite thin to around 3-4mm and lay it into a baking tray lined with parchment/greaseproof paper. Trim the edges and pop it in the oven for about 5-6 minutes. This is known as ‘Blind Baking’ it ensures your pastry cooks thoroughly later. You’ll notice it is par-cooked. Allow to cool. Turn your oven up now to 160 Gas 5/6.
- Now add your sponge mix to your cooled pastry and spread evenly.
- Place your tray into the oven, here’s a few cooking tips. After 8-10 minutes turn your tray around and lay a loose sheet of foil to cover the top of the cake and leave it for a further 5-8 minutes. Now check to feel if the sponge is feeling firm. The foil prevents over cooking, burning and drying out. It also reflects the heat back into the sponge, reducing cooking time.
- Tip. It’s always good to keep your sponge moist, here’s a trick I always use. Cover a chopping board with cling film. When you remove the tray from the oven, lay the board on top of the cake then flip upside down, remove the tray and allow to rest to cool. The heat with the film puts moisture back into the sponge, it will also give you a perfectly flat top for decorating.
- The (optional) Ganache topping can now be made by melting the chocolate and adding the cream but, you can use supermarket chocolate spread or Nutella equivalent.
- Now using the baking tray on top of your pastry, flip the tray around and remove the chopping board to reveal your smooth top to decorate. I do like straight edges and uniform decorating because it adds to presentation but it is not necessary.
- Decorate your top as you please, slice and serve. You have a very moist chocolate cake, as ever, enjoy.
Slice of rich chocolate cake on wood dish, concept to present birthday cake party or cafe and restaurant. At Awfully Chocolate, every cake is handcrafted with love using premium quality ingredients. Whether you wish to celebrate the birthday of a best friend Our best selling chocolate cakes in Singapore is a favourite amongst many and have won the hearts of many loyal customers. The cake that started it all. Chocolate is a woman's secret indulgence.
So that’s going to wrap this up for this special food rich chocolate slice cakes recipe. Thanks so much for reading. I am confident that you will make this at home. There is gonna be interesting food in home recipes coming up. Remember to save this page in your browser, and share it to your family, colleague and friends. Thanks again for reading. Go on get cooking!